
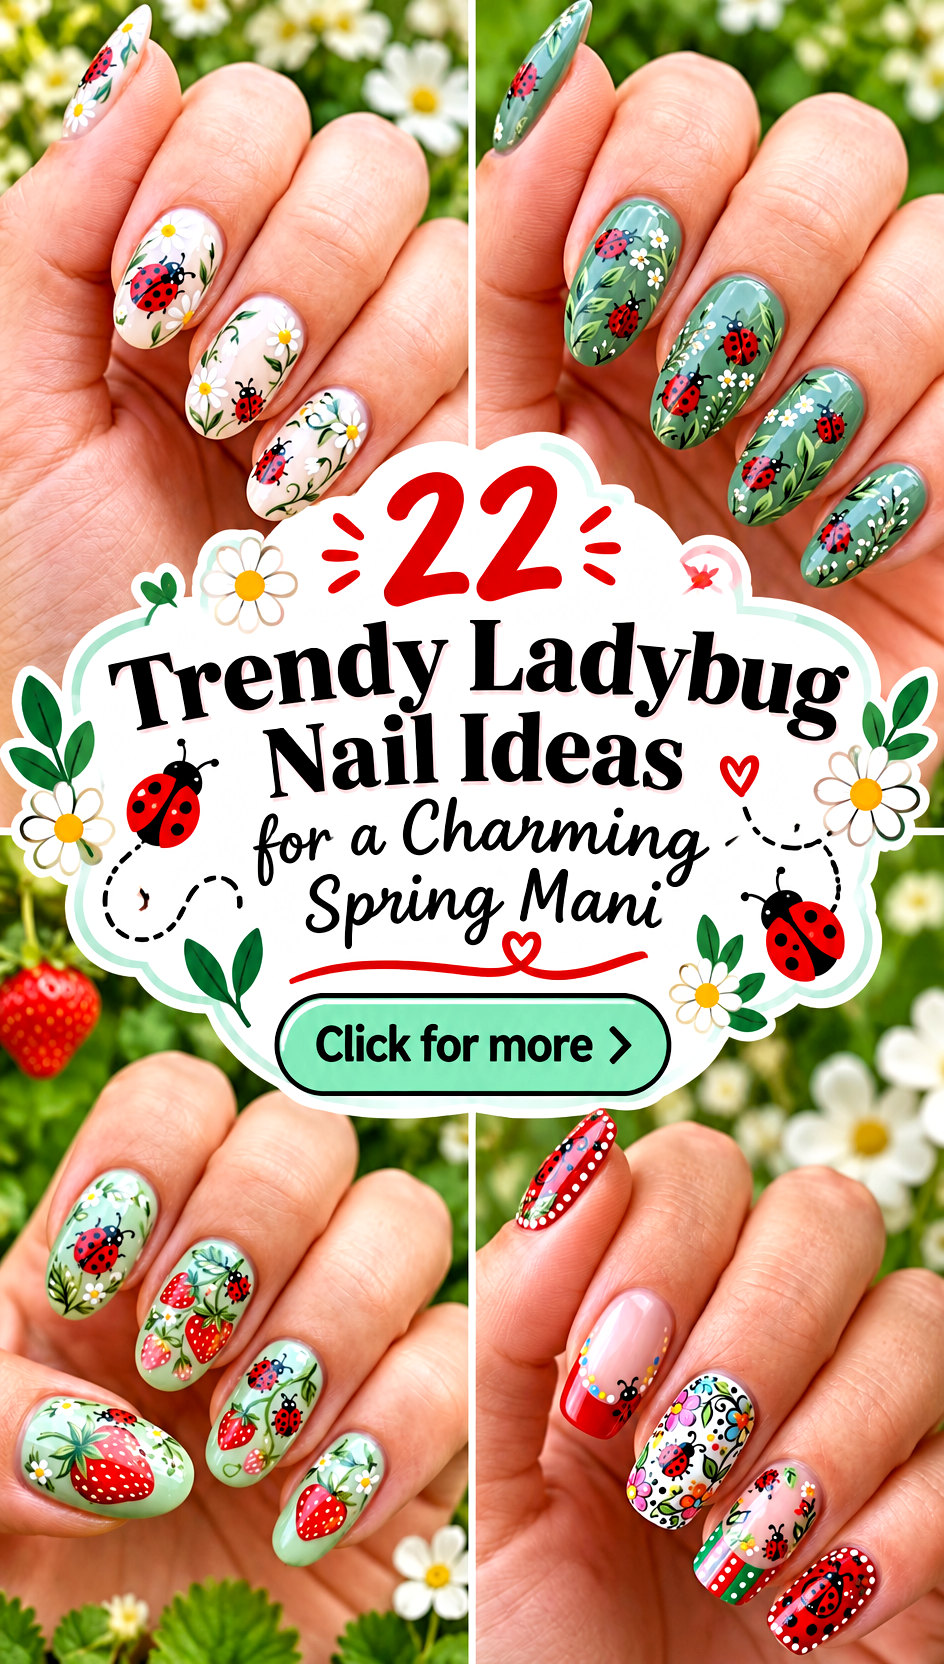
Ladybug nail art is having a charming moment, bringing together playful nature-inspired details, classic red-and-black contrast, and creative manicure techniques. These 22 trendy ladybug nail ideas take the beloved little insect beyond a basic accent nail, pairing it with French tips, florals, gingham, greenery, chrome effects, 3D details, and cheerful seasonal colors. Ladybug designs can look polished and sophisticated while still keeping their whimsical personality. Whether you prefer almond, square, oval, or short nails, there is plenty of room to personalize the concept. From bold full-coverage artwork to colorful no garden-inspired sets, these manicures are perfect for anyone who wants eye-catching nails with a fun, Pinterest-worthy finish.
1. Classic Red Ladybug Nails
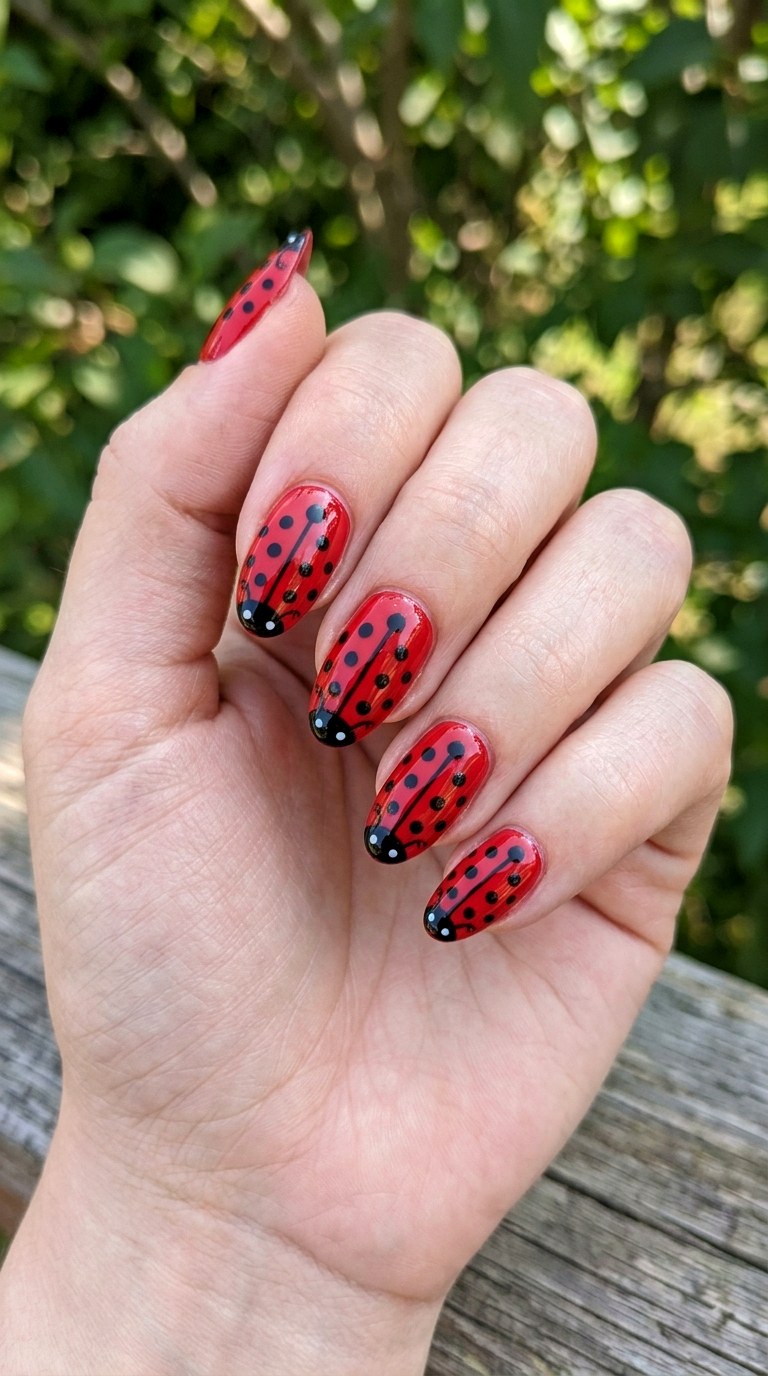
Give the classic ladybug its moment with a vibrant red manicure featuring detailed black spots, tiny heads, antennae, and crisp outlines. Paint every nail with a coordinated ladybug motif for a cohesive statement set rather than limiting the artwork to one accent nail. A glossy topcoat makes the red look especially rich and helps the black details stand out. This timeless combination captures the instantly recognizable ladybug palette while keeping the overall manicure cheerful, polished, and bold enough to become the centerpiece of your look.
2. Ladybug French Tip Nails
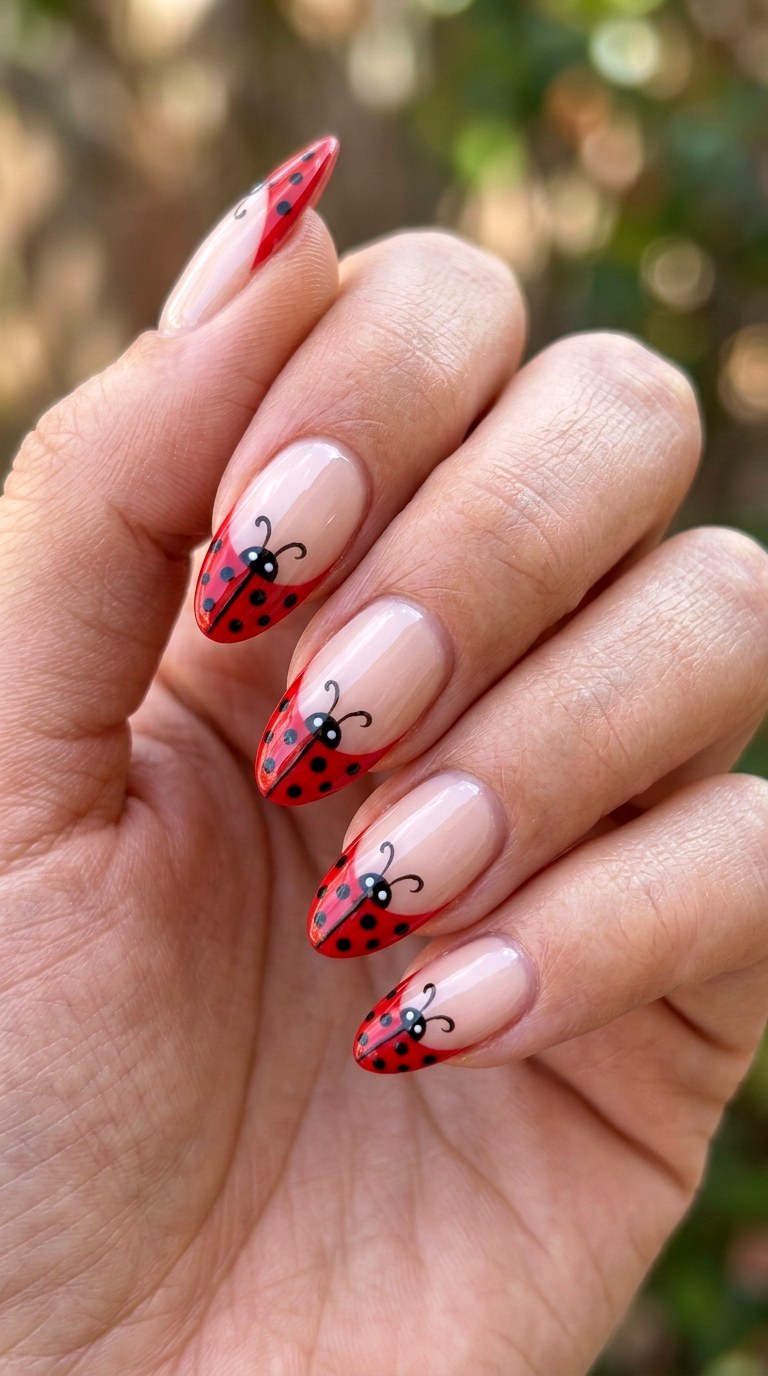
Refresh the traditional French manicure by turning each tip into a tiny ladybug-inspired scene. Use a soft nude or milky base, then create vivid red tips with black curved details, dots, and delicate antennae. Some nails can feature complete ladybugs while others carry coordinated black dots or tiny hearts. The French structure keeps the manicure organized and sophisticated while the insect artwork adds personality. This is a particularly stylish option for almond or oval nails where the curved tip gives the ladybug shapes plenty of room to look natural.
3. Ladybugs And White Flowers
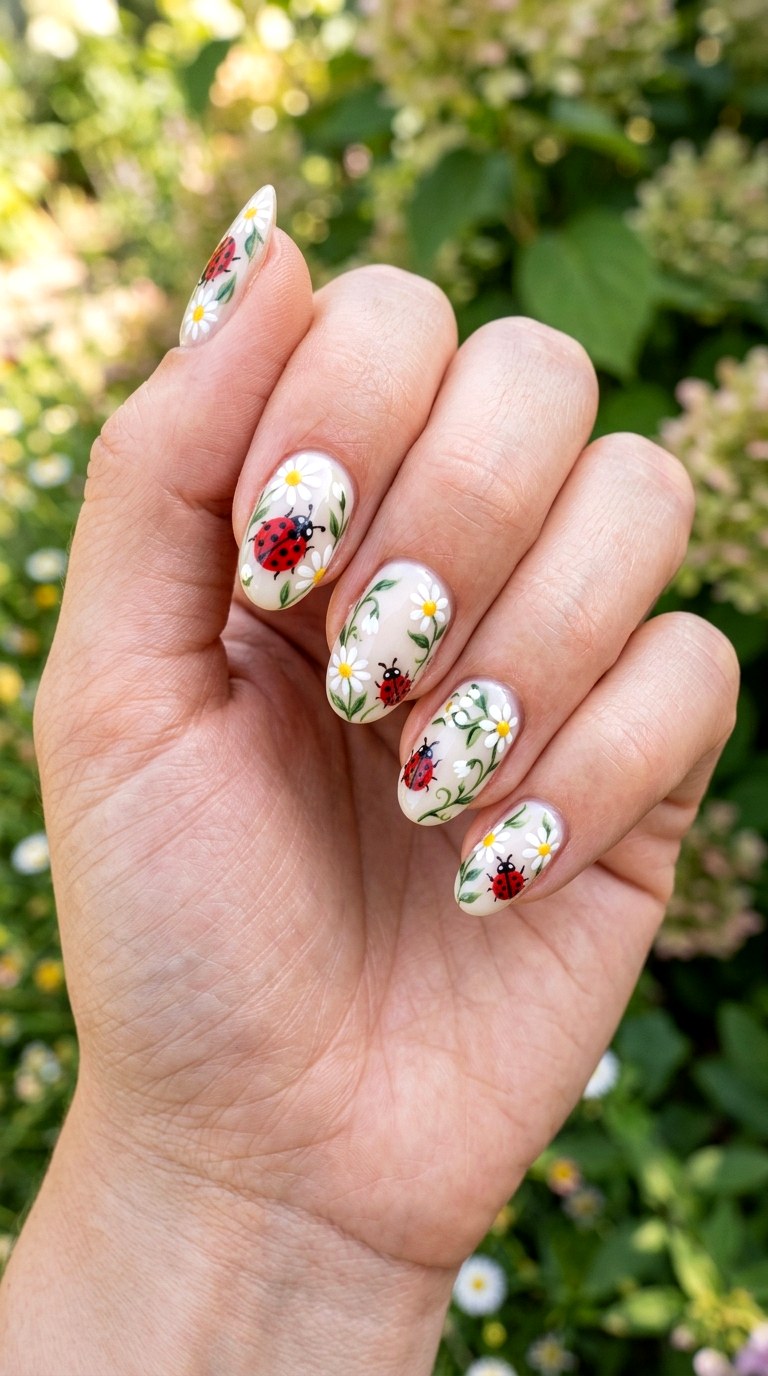
Create a cheerful no garden manicure by combining bright ladybugs with white flowers across the nails. Use a fresh base shade and paint clusters of small petals around several detailed ladybugs, allowing the red bodies to become colorful focal points. Add thin green stems and leaves for a complete botanical effect. The contrast between white florals, green foliage, and red ladybugs creates a lively spring-inspired palette. Glossy finishing details can make the artwork look crisp and dimensional without overwhelming the individual floral and insect elements.
4. Pink Ladybug no garden Nails
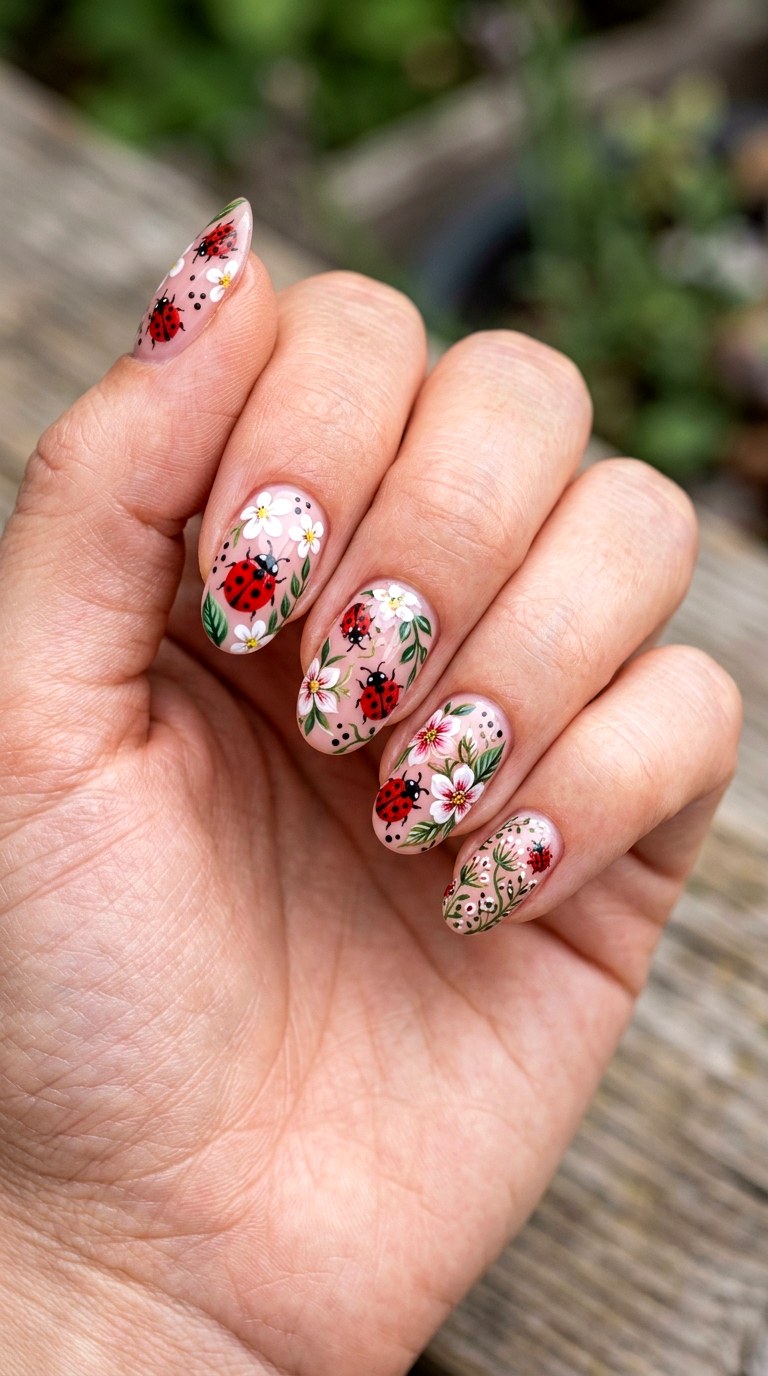
Soft pink provides a beautiful modern backdrop for colorful ladybug artwork. Choose a blush or rosy pink base, then add red ladybugs with black spots, delicate green leaves, and tiny white flowers. Keep the designs generously sized so every nail feels intentionally decorated rather than sparse. Alternating floral nails with full ladybug nails creates an attractive rhythm across the hand. This combination feels feminine and playful while still looking polished enough for everyday wear, making it a great choice for anyone who wants a softer interpretation of the classic red-and-black theme.
5. Ladybug Gingham Picnic Nails
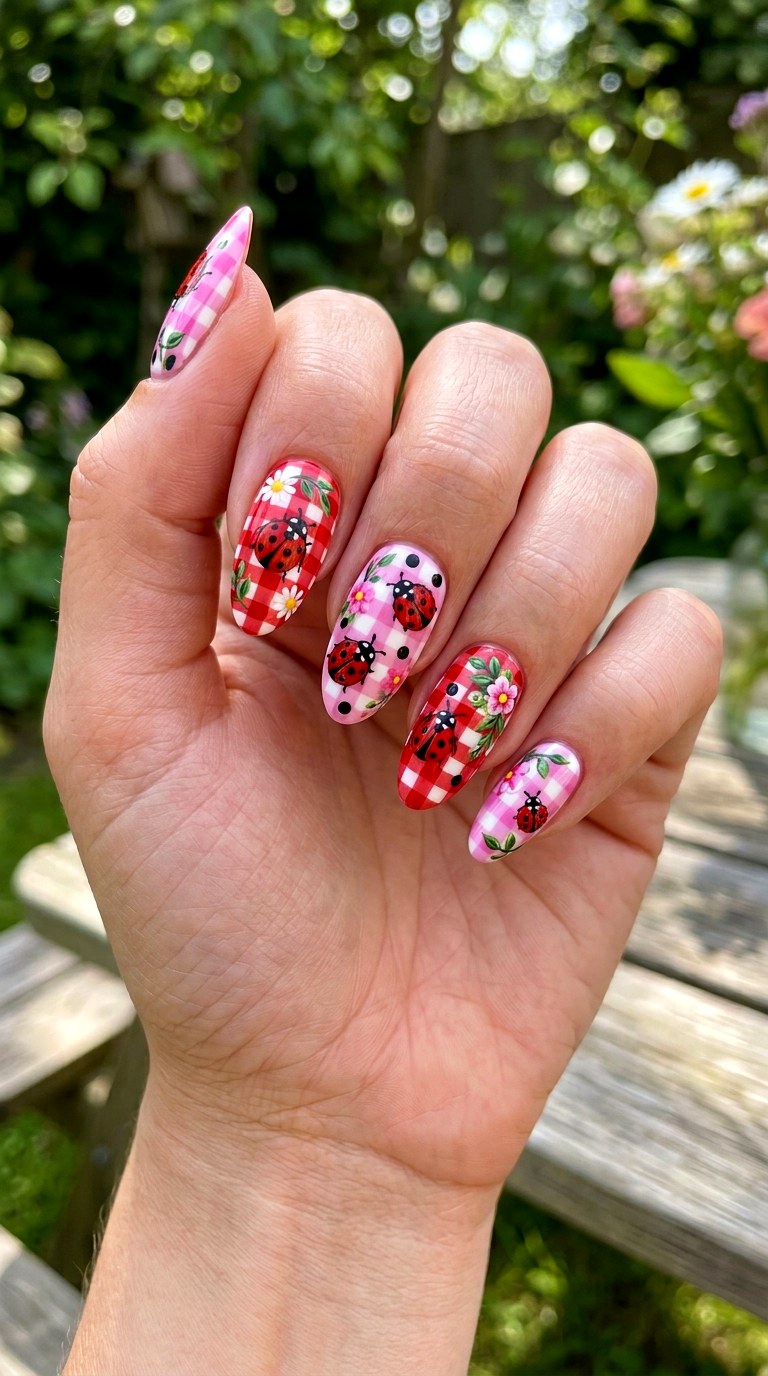
Bring a playful picnic aesthetic to your manicure with gingham-inspired backgrounds and detailed ladybugs. Use coordinated pink, red, or soft blue checks on selected nails, then place bold ladybug artwork over complementary sections. Add tiny flowers, leaves, or picnic-inspired dots to connect the designs. The structured gingham pattern gives the manicure a fashionable graphic element, while the ladybugs keep it whimsical. For an especially cohesive finish, repeat the same black detailing throughout the set so the checks and illustrated insects look like parts of one carefully planned design.
6. 3D Ladybug Nail Art
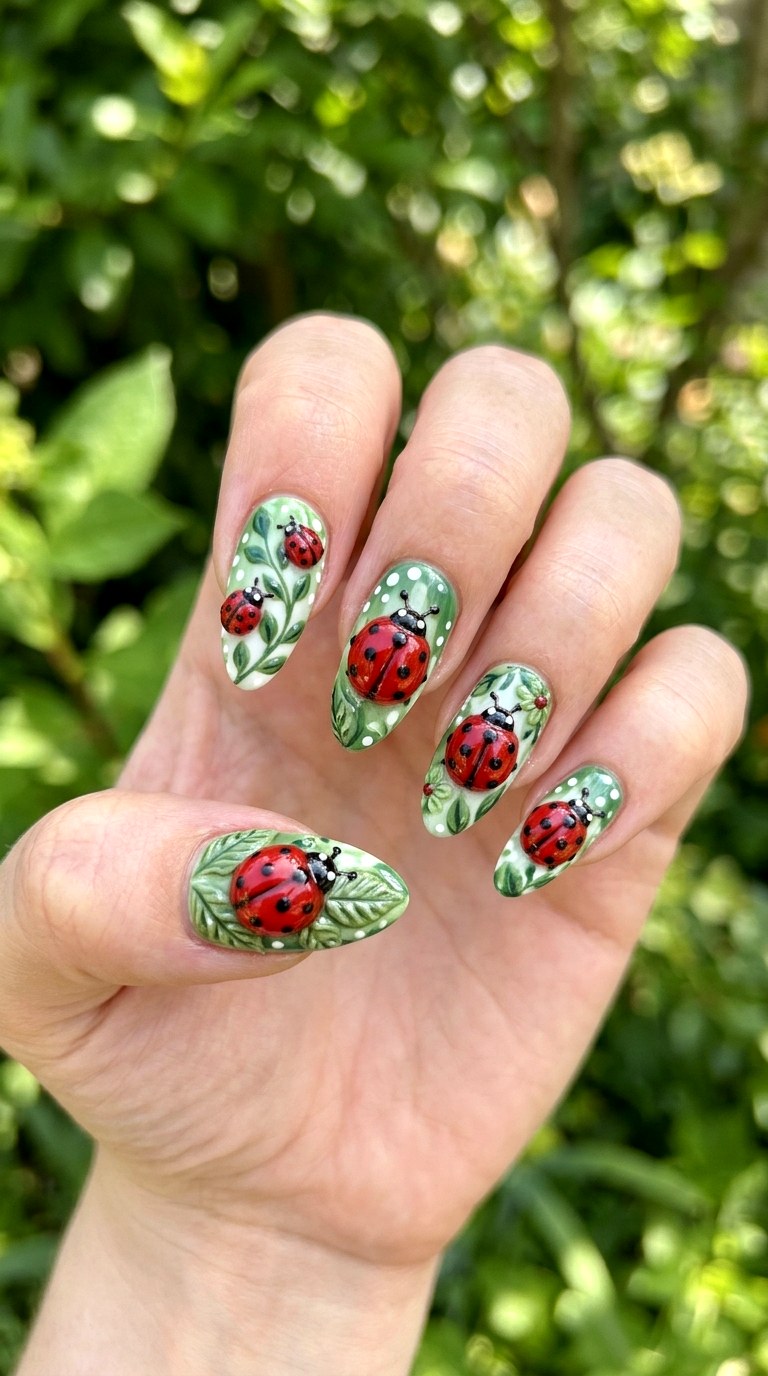
Make the ladybugs stand out with raised 3D nail art. Sculpt or build textured red bodies, glossy black spots, tiny heads, and dimensional details over a coordinated base. Pair the raised insects with flowers, leaves, or curved French tips to create a miniature no garden scene. The three-dimensional finish catches the light beautifully and gives the manicure a sculptural quality. Keep the surrounding artwork coordinated rather than adding unrelated decorations, allowing the raised ladybugs to remain the stars of the design and giving the entire set a polished salon-art appearance.
7. Sage Green Ladybug Nails
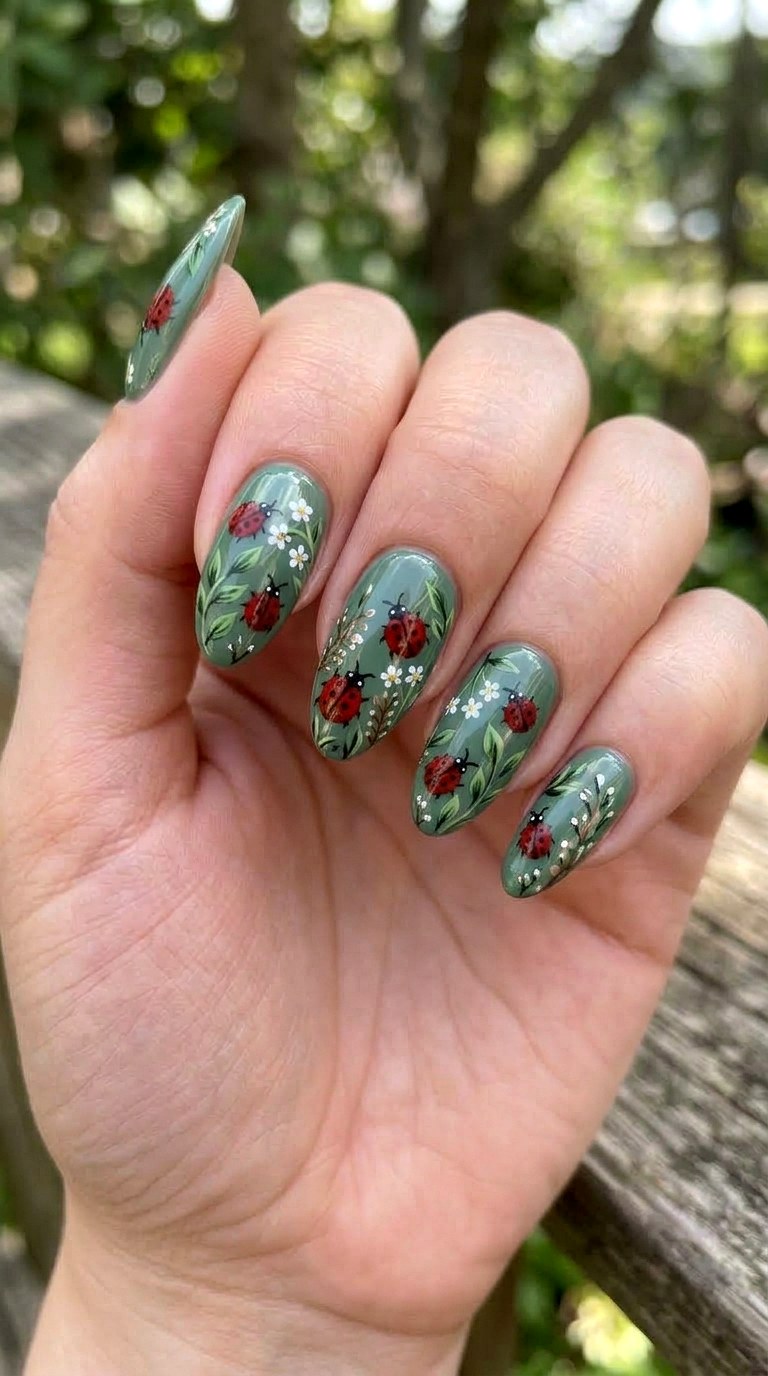
Sage green creates a fresh botanical background for vivid red ladybugs. Cover the nails in a glossy sage shade, then layer detailed ladybugs, darker green leaves, and tiny floral accents across selected nails. The muted green makes the red insects pop dramatically while giving the manicure a no garden-inspired personality. Add a few black dots or fine botanical outlines to connect the artwork. This color combination feels especially fresh for spring and summer, but the sophisticated sage base also makes the playful subject surprisingly wearable beyond seasonal occasions.
8. Ladybug Chrome Accent Nails
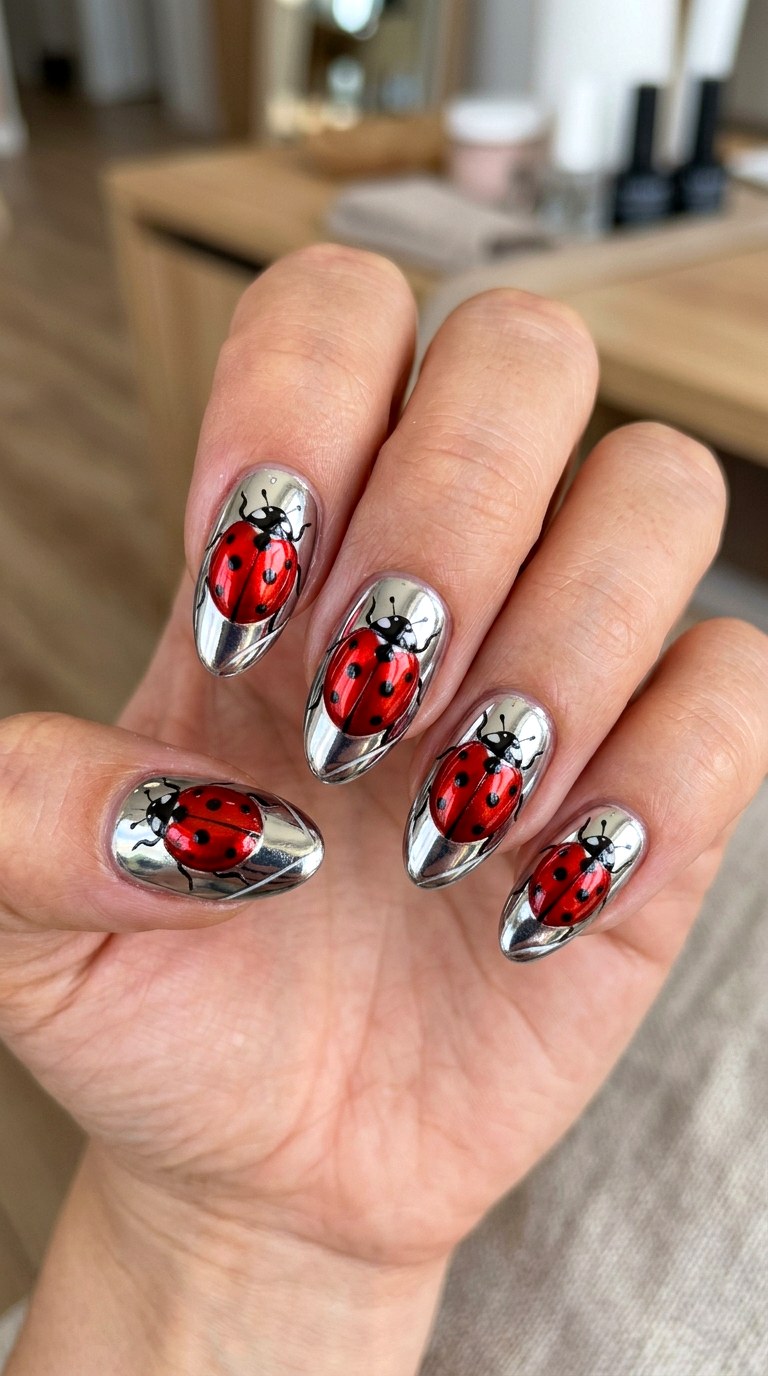
Give traditional ladybug artwork a contemporary update with chrome accents. Use a glossy red, black, or neutral foundation and add metallic chrome detailing around selected ladybugs, French edges, or decorative shapes. A reflective silver accent can make the tiny black spots and red bodies feel more modern without changing the recognizable insect design. Keep the chrome strategically placed so it enhances rather than hides the artwork. The result combines whimsical illustration with a fashion-forward finish, creating a manicure that feels more elevated and editorial than a conventional ladybug set.
9. Ladybug And Daisy Nails
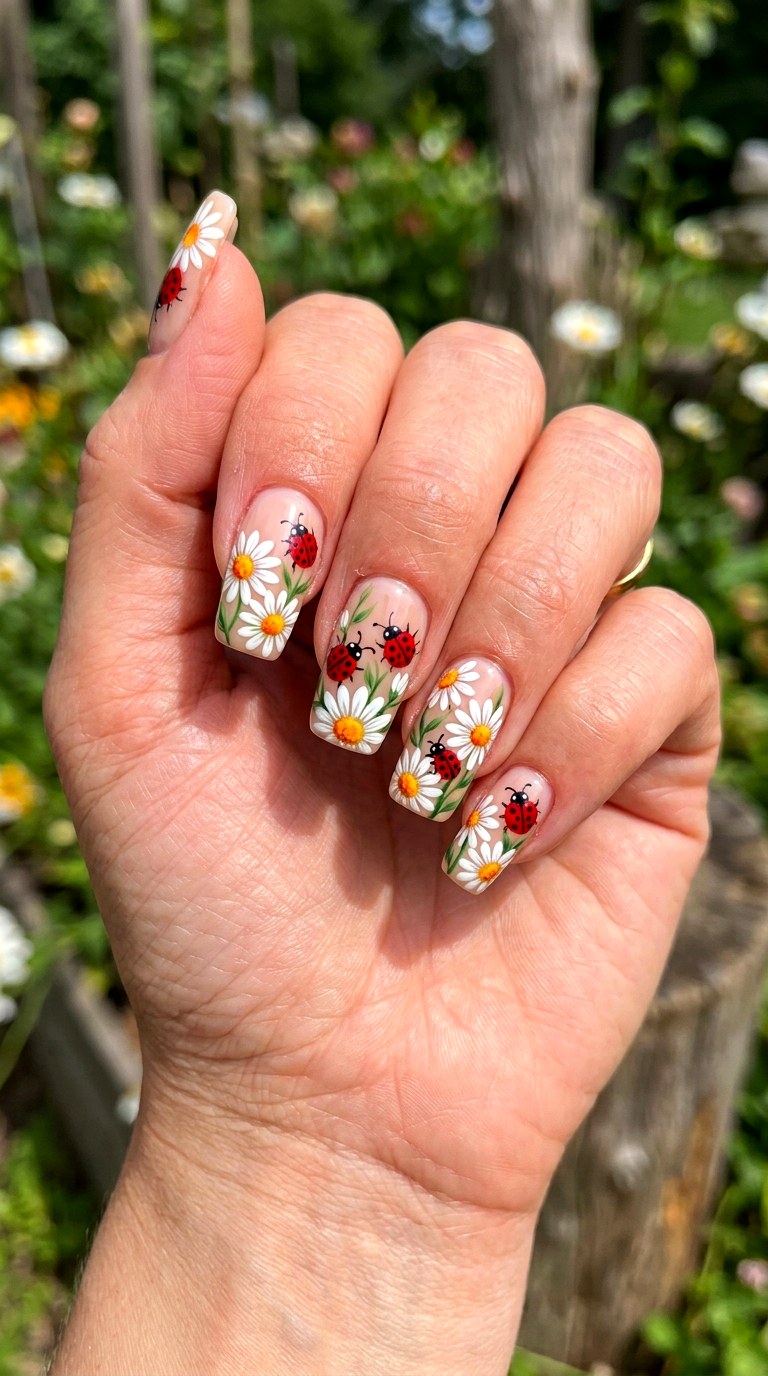
Combine two cheerful no garden favorites with a manicure featuring ladybugs and daisies. Paint large white daisies with sunny centers on several nails, then position bright red ladybugs nearby as if they are exploring the flowers. Add green stems and leaves to fill the composition and create natural movement. Use a light base to keep the colors crisp and vibrant. This design works beautifully across medium and long nail shapes because the extra surface area allows the flowers, insects, and foliage to become detailed artwork rather than tiny isolated decorations.
10. Red And Black Polka Dot Nails
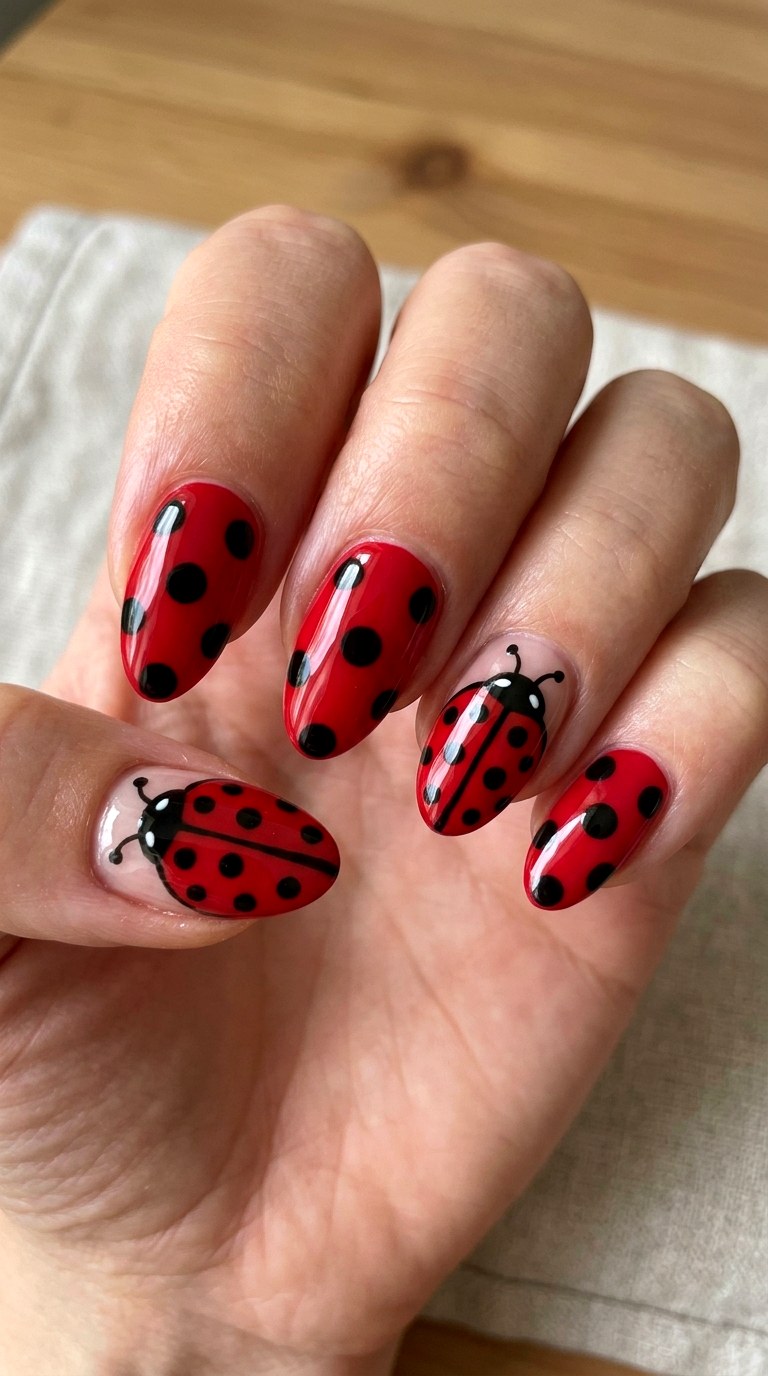
Turn the ladybug's signature spots into the main theme with a bold red-and-black polka dot manicure. Alternate full red nails covered with neatly arranged black dots and detailed ladybug nails featuring recognizable heads and antennae. Use different dot sizes to create visual variety while keeping the same color palette throughout the set. A glossy finish makes the red especially vibrant. This design feels graphic, playful, and instantly connected to the ladybug theme while remaining easier to coordinate than a manicure filled with multiple unrelated colors.
11. Milky White Ladybug Nails
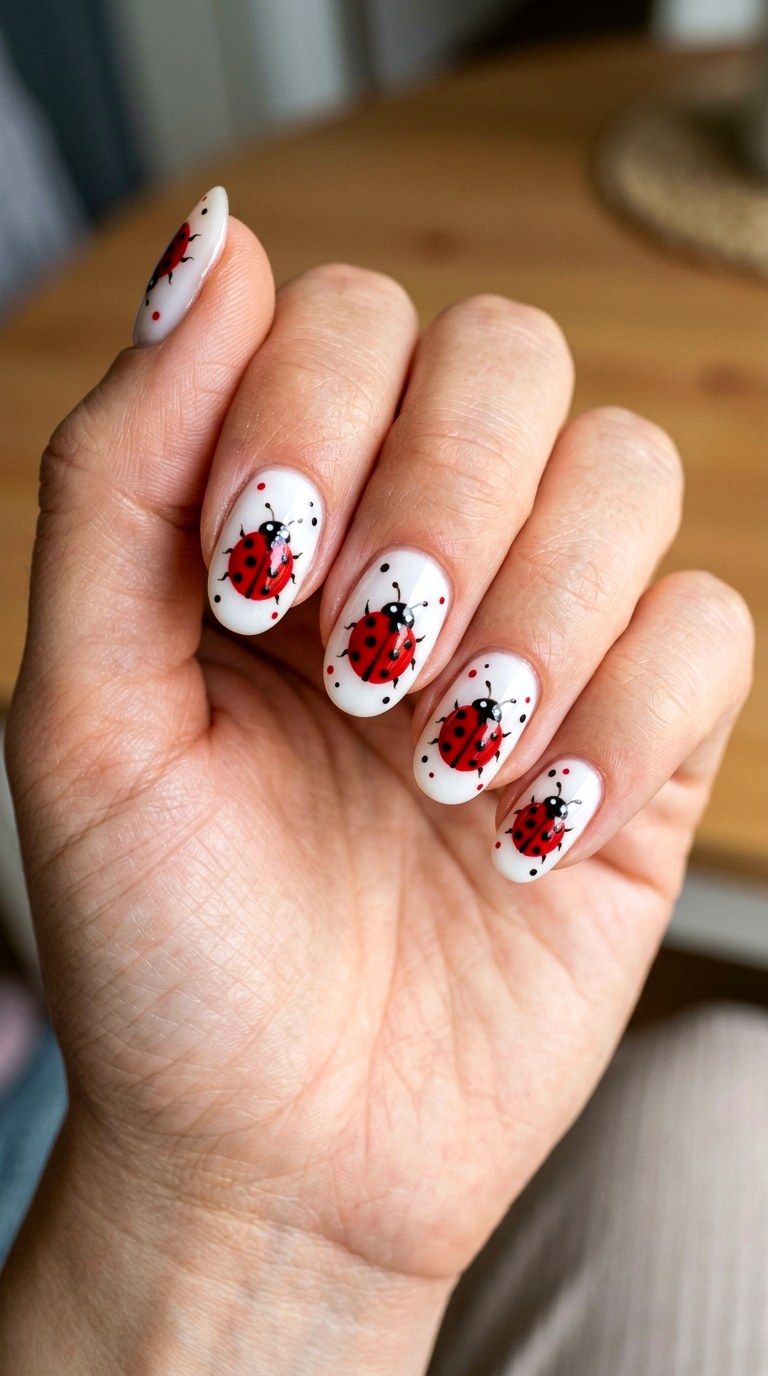
Milky white nails offer a clean, luminous canvas for detailed ladybug artwork. Cover every nail with an opaque milky base, then add several large red ladybugs with black heads, spots, legs, and antennae. Complement the insects with tiny red dots and delicate botanical details so the set feels complete. The creamy background provides strong contrast without looking harsh, allowing the red and black artwork to dominate beautifully. This approach gives the manicure a modern salon finish while keeping the playful ladybug subject at the center of attention.
12. Ladybug And Strawberry Nails
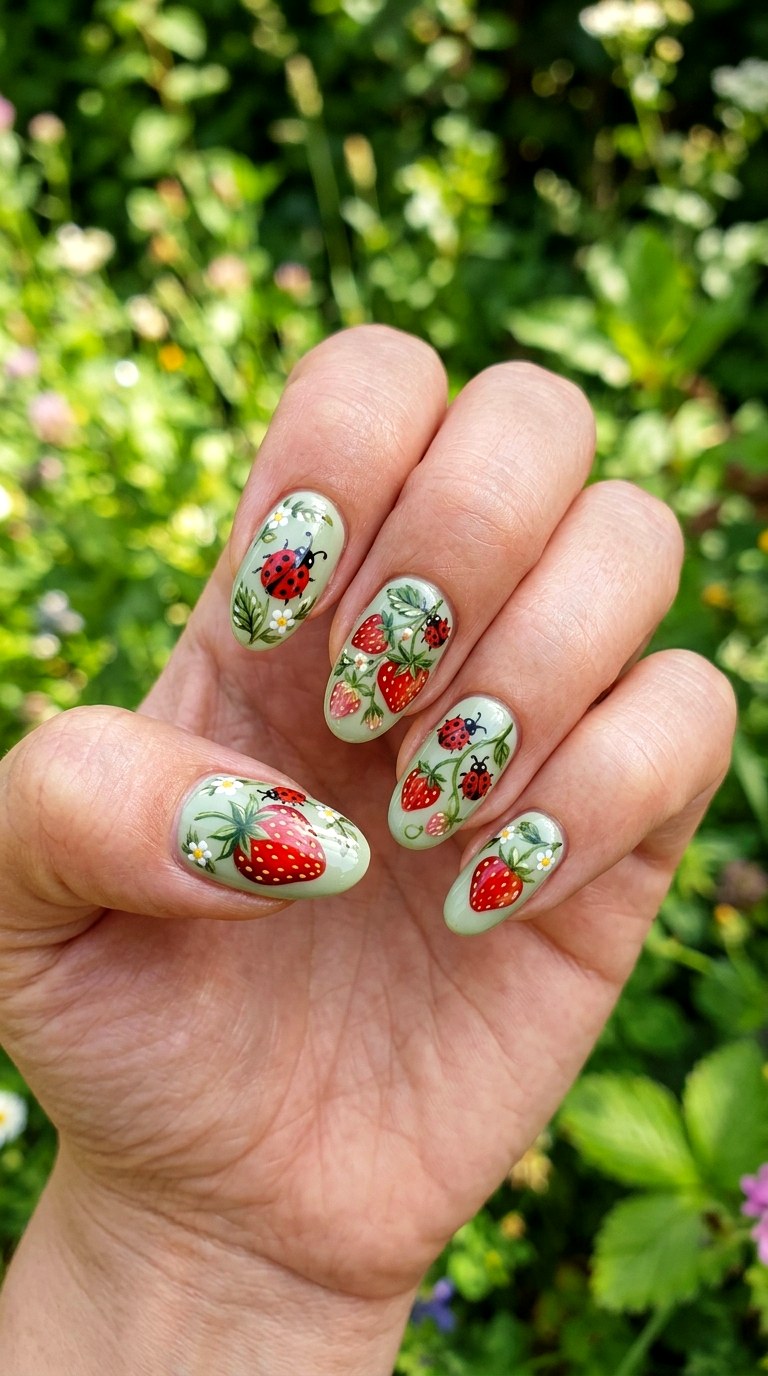
Create a colorful no garden-inspired manicure by pairing ladybugs with juicy strawberry illustrations. Use bright red strawberries with green leafy tops alongside red-and-black ladybugs, keeping the artwork crisp and coordinated. A soft cream, pale green, or light pink background can help both motifs stand out. Add tiny flowers or leaves between the larger illustrations to connect the composition. The combination feels cheerful and summery, especially when each nail carries a clearly defined illustration. A high-gloss finish completes the fresh, candy-like appearance without making the design feel overly busy.
13. Black French Ladybug Nails
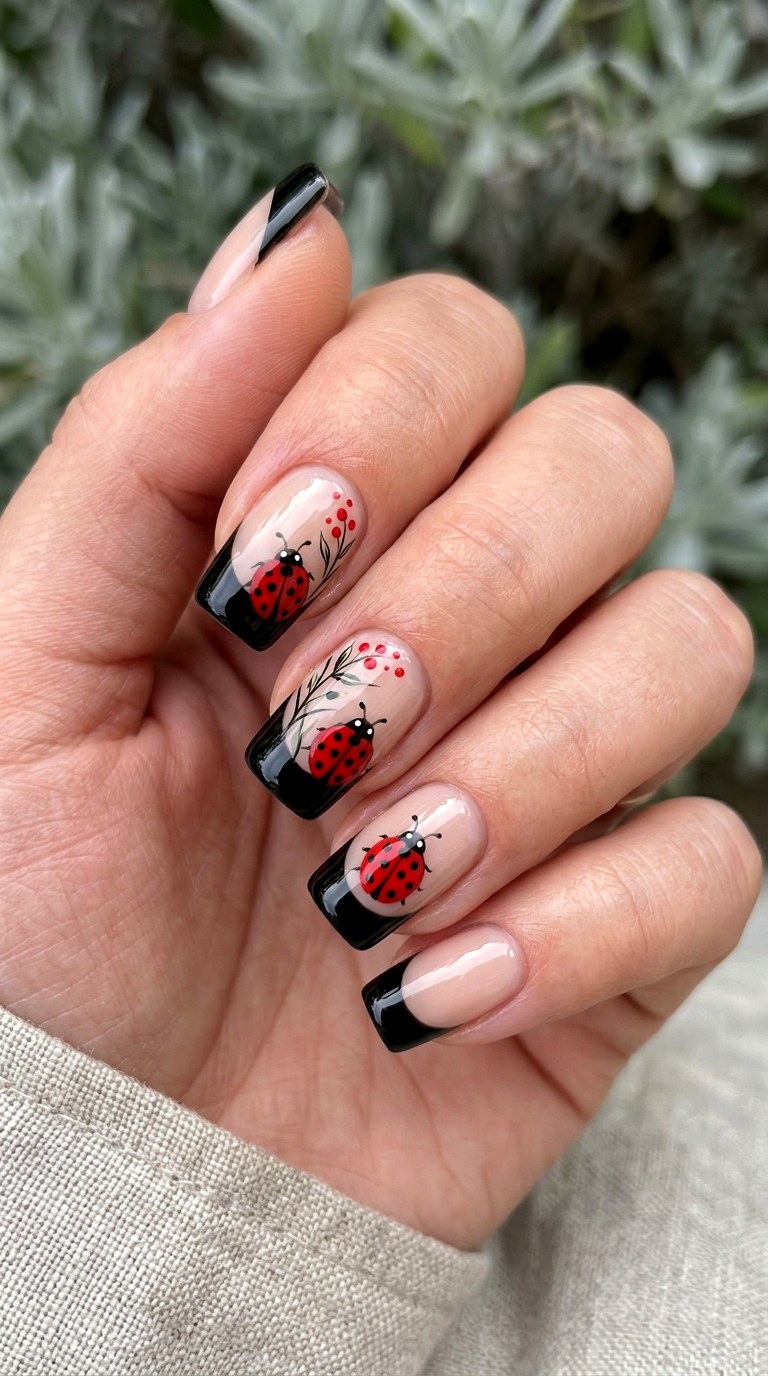
For a moodier interpretation, combine black French tips with vivid ladybug artwork. Start with a sheer or soft neutral base, then create sharply curved black tips across the nails. Place bright red ladybugs over selected nails, using clean black outlines so they connect visually with the French tips. Add tiny red dots or miniature flowers to the remaining nails for balance. This version feels more sophisticated and slightly edgy than traditional red French ladybug nails while retaining the cheerful insect motif and strong contrast that makes the design instantly recognizable.
14. Ladybug Cat-Eye Nails
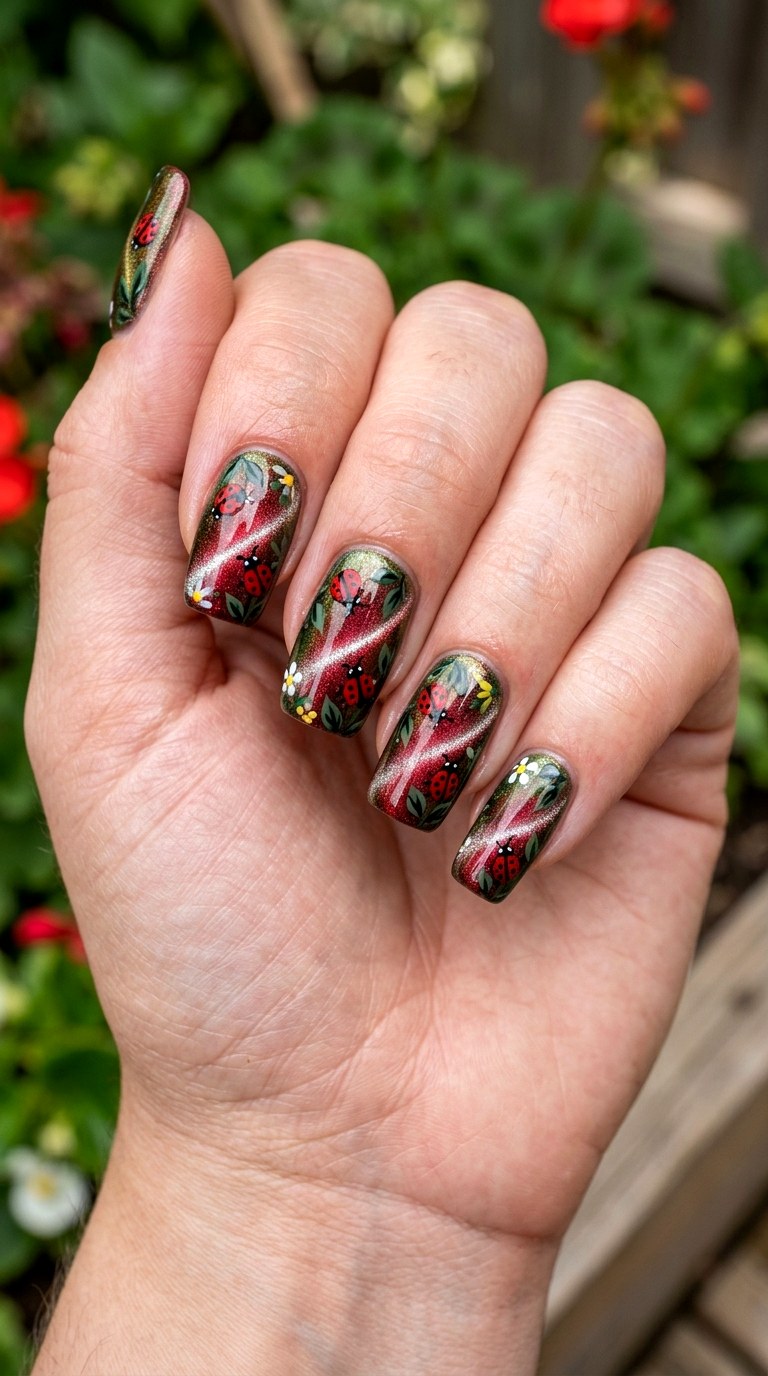
Blend magnetic cat-eye polish with detailed ladybug artwork for a multidimensional manicure. Choose a deep green, red, or neutral magnetic base with a visible reflective sweep, then place glossy ladybugs over selected nails. The shifting light beneath the illustrations creates depth while the red bodies and black spots provide a strong focal point. Add tiny leaves or flowers where needed to complete the no garden theme. This design is ideal when you want your manicure to combine current reflective finishes with detailed hand-painted artwork and a distinctly playful subject.
15. Mint Green Ladybug Tips
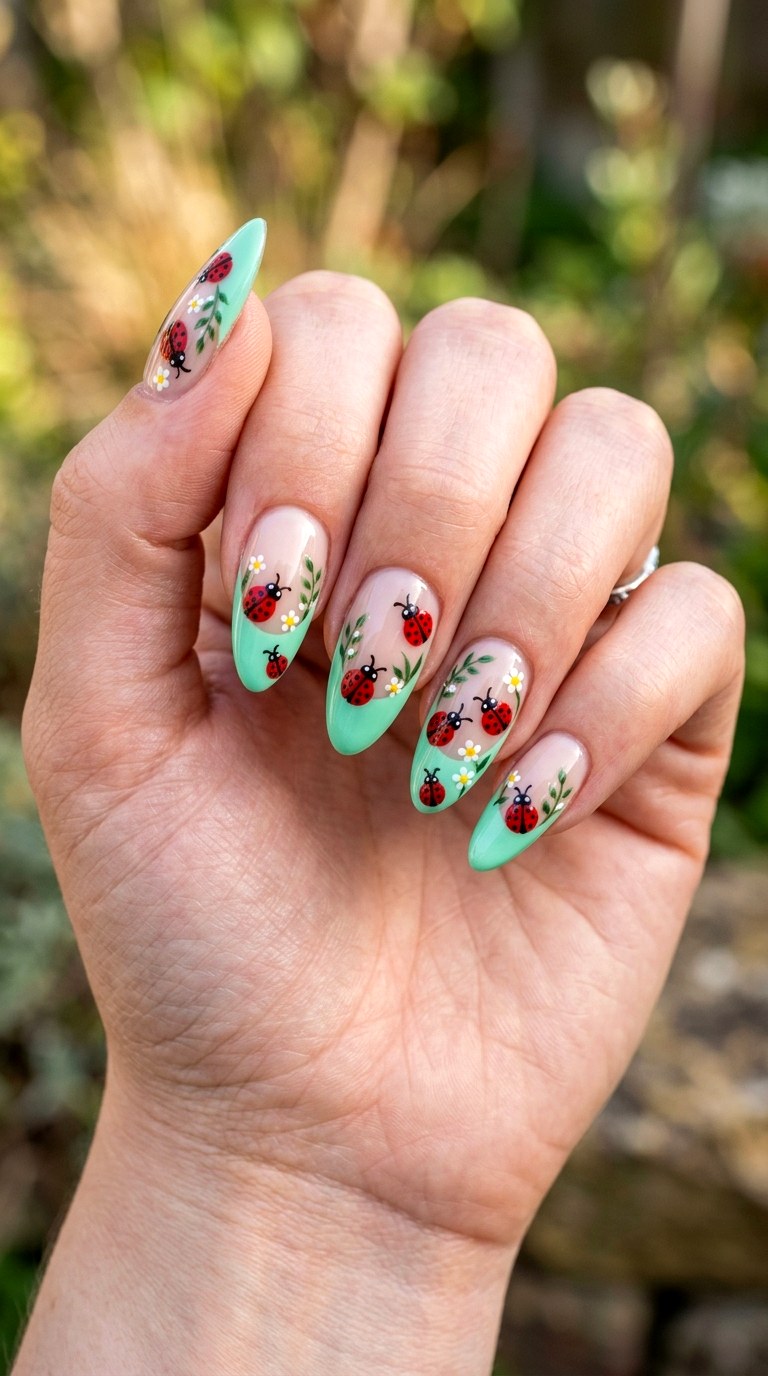
Fresh mint green gives ladybug nails a colorful update while keeping the manicure bright and wearable. Create bold mint French tips across the set, then decorate selected nails with red ladybugs, black spots, and delicate green botanical details. Use a pale neutral base to make the mint and red contrast clearly. You can vary the ladybug placement so some insects appear centered while others sit near the tips or beside small flowers. The result feels fresh, youthful, and no garden-inspired without relying entirely on the traditional red background.
16. Ladybug Floral French Nails
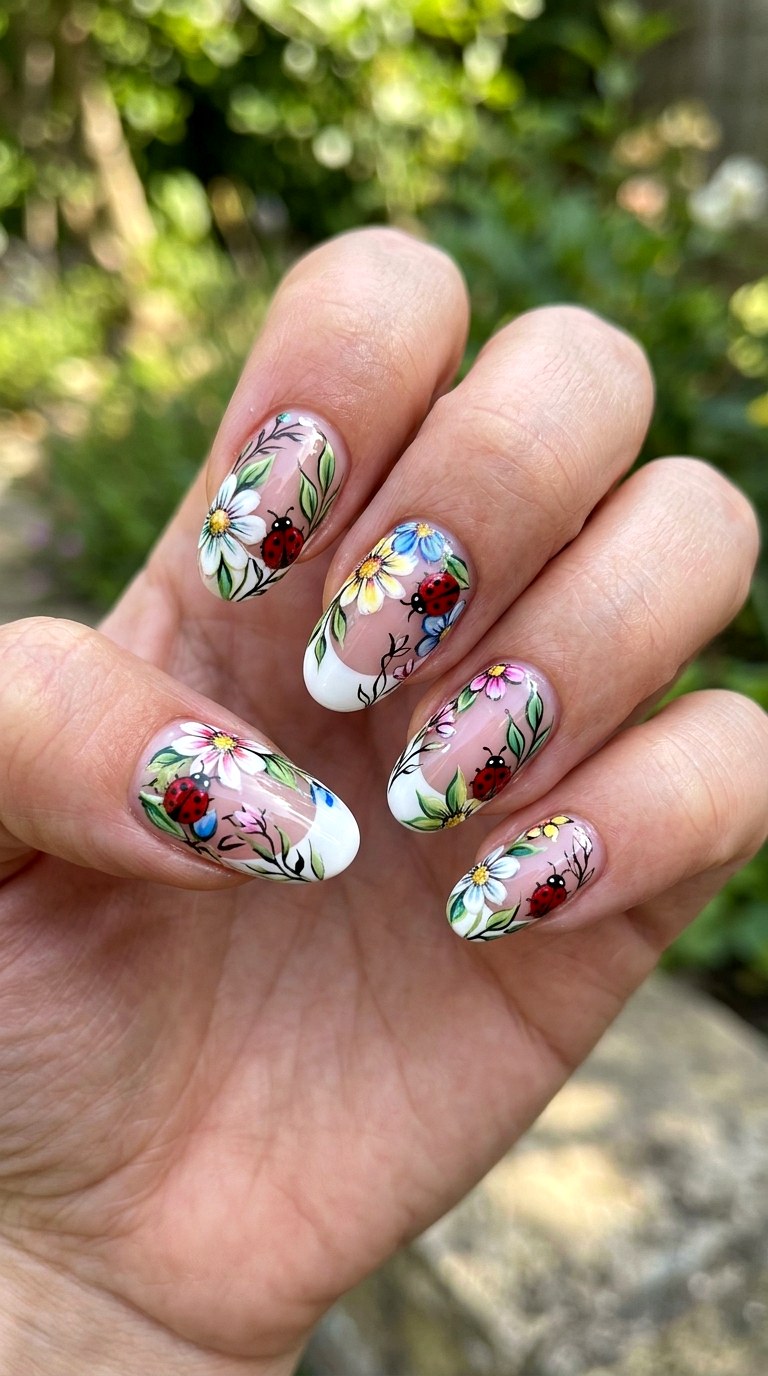
Combine French manicure structure with detailed flowers and ladybugs for an elaborate no garden-inspired set. Start with elegant French tips in a coordinated shade, then place large flowers across several nails with ladybugs resting beside or inside the floral compositions. Use green leaves and thin black outlines to connect the artwork. Keep the flowers and insects clearly visible rather than making them overly tiny. This design creates a balanced mix of sophistication and whimsy, making it particularly attractive for almond or coffin-shaped nails where the longer canvas supports intricate botanical artwork.
17. Ladybug Heart Nail Art
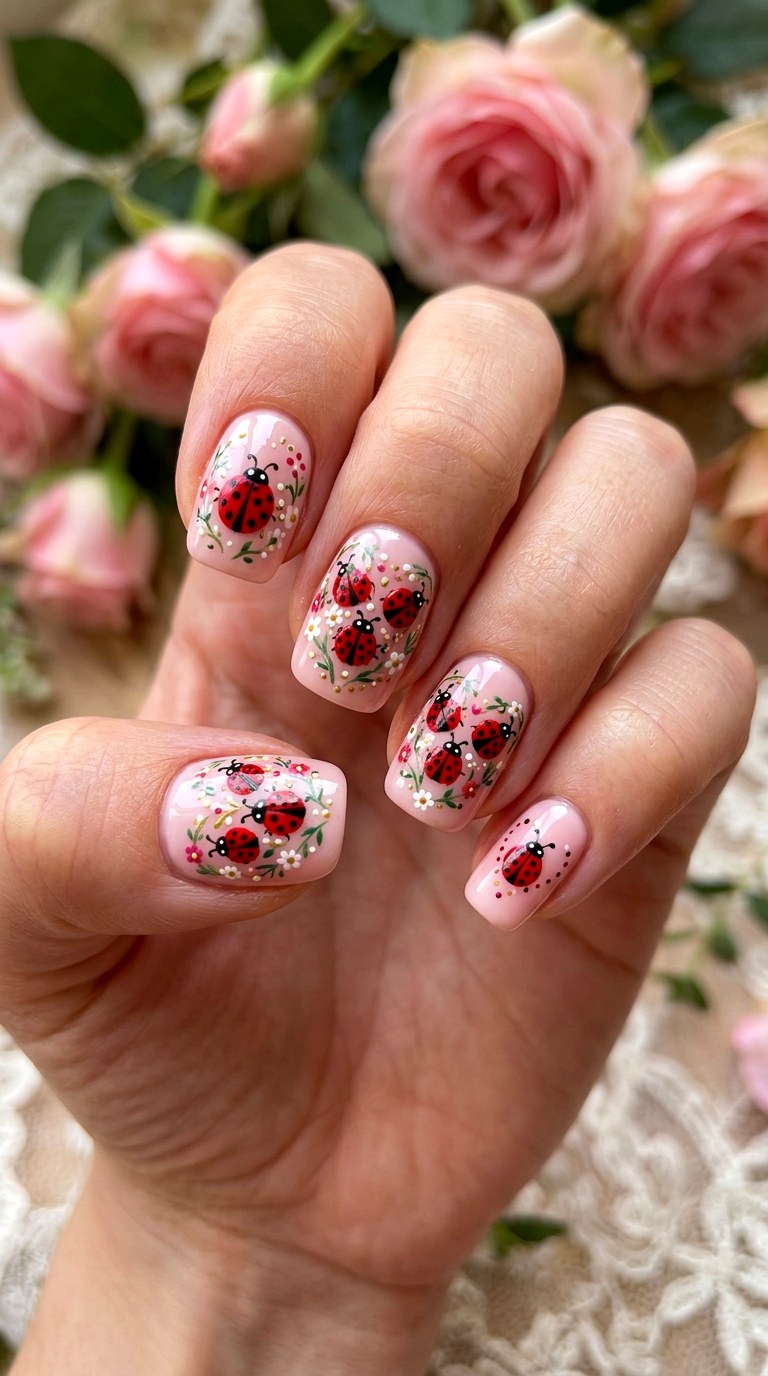
Give the classic insect motif a romantic twist by arranging ladybug bodies and spots into heart-inspired compositions. Use bright red ladybugs with black detailing and position them so their curved forms create playful heart shapes across selected nails. Surround them with tiny flowers, dots, or leaves for additional structure. A soft pink or creamy base works especially well with the red and black artwork. The design remains unmistakably ladybug-themed while introducing a sweet graphic element that makes the manicure feel creative, expressive, and highly personalized.
18. Colorful Ladybug Mix Nails
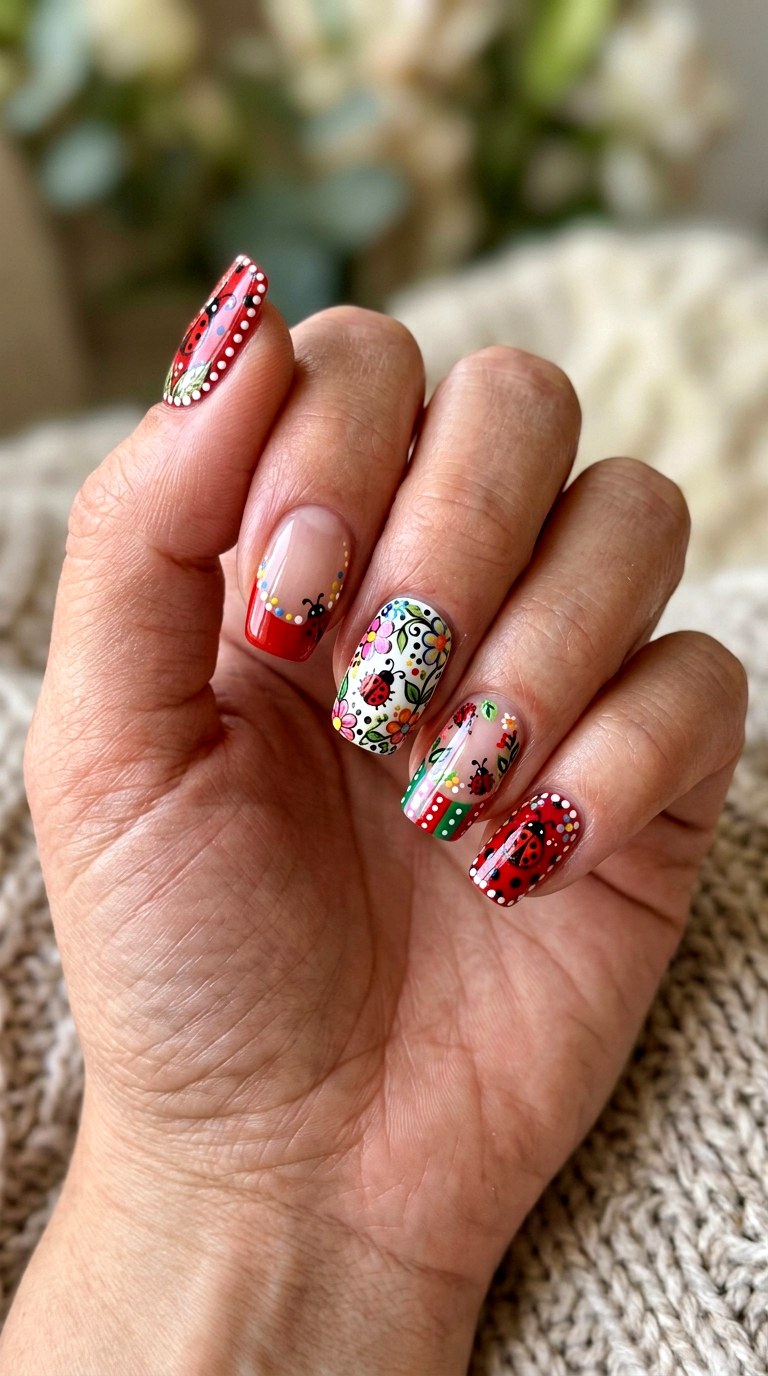
Create an energetic mismatched manicure by giving each nail a coordinated but distinct ladybug-inspired design. Combine red ladybugs, colorful French tips, flowers, leaves, dots, and playful no garden motifs while maintaining repeated black detailing throughout the set. Choose a controlled palette so the manicure feels intentionally mixed rather than random. Each nail becomes its own small illustration, yet the repeated ladybug shapes keep the entire design connected. This approach is perfect for anyone who loves expressive nail art and wants every fingertip to offer something different.
19. Ladybug And Leaf Nails
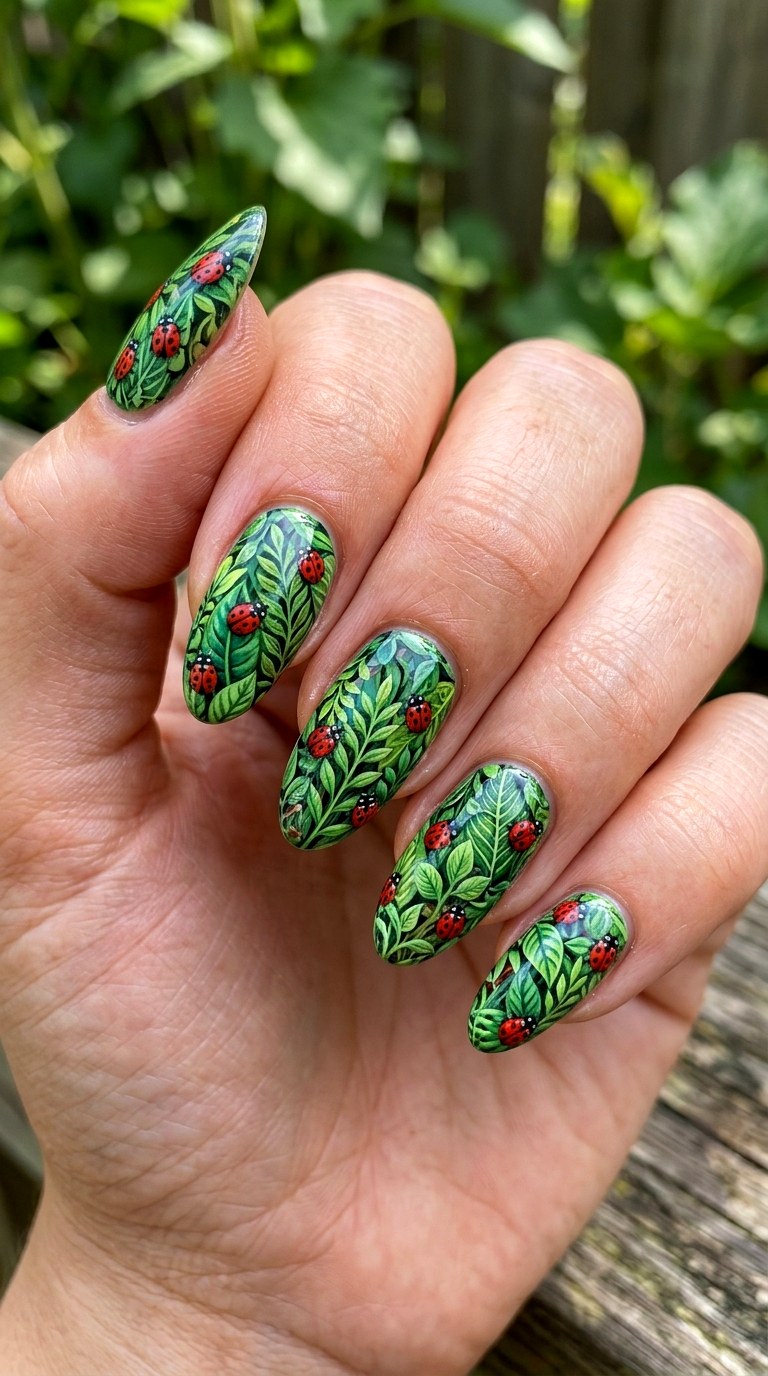
Build a miniature botanical scene with richly painted leaves and bright ladybugs. Use deep or soft green leaves as the main background artwork, then add red insects with crisp black spots across several nails. Include delicate stems, small veins, and tiny buds to make the foliage look detailed and natural. A glossy finish can emphasize the contrast between the smooth green leaves and vivid red ladybugs. This design has a lush no garden feeling and works particularly well when the artwork covers most of each nail instead of leaving large empty areas.
20. Gold Detail Ladybug Nails
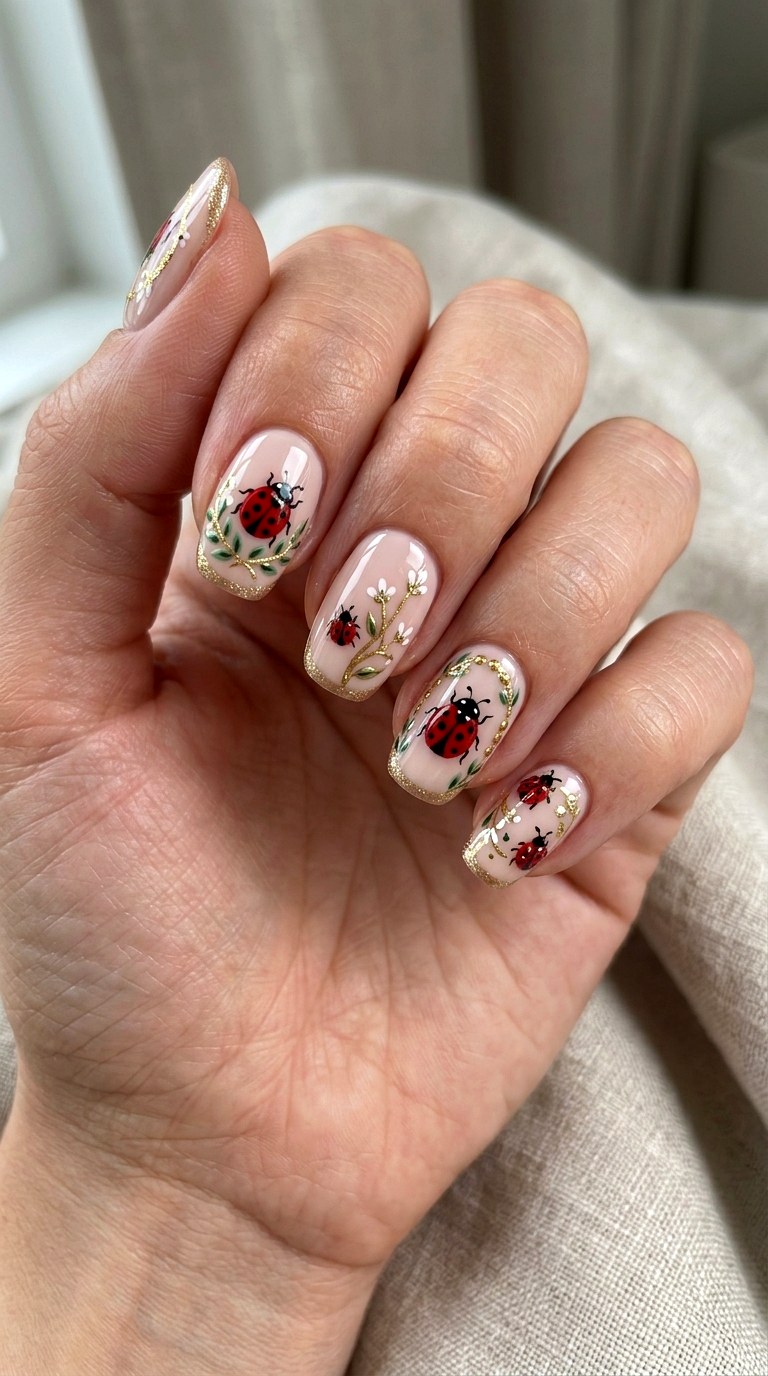
Elevate the playful motif with refined gold detailing. Paint vibrant ladybugs over a neutral, creamy, or soft pink base, then add thin gold accents around selected insects, flowers, or French edges. Small gold details can highlight the design without competing with the red bodies and black spots. Add botanical elements such as leaves and tiny flowers to create a cohesive composition. The combination of warm metallic accents and classic ladybug colors gives the manicure a polished statement finish that feels especially luxurious for celebrations or special occasions.
21. Ladybug Water Drop Nails
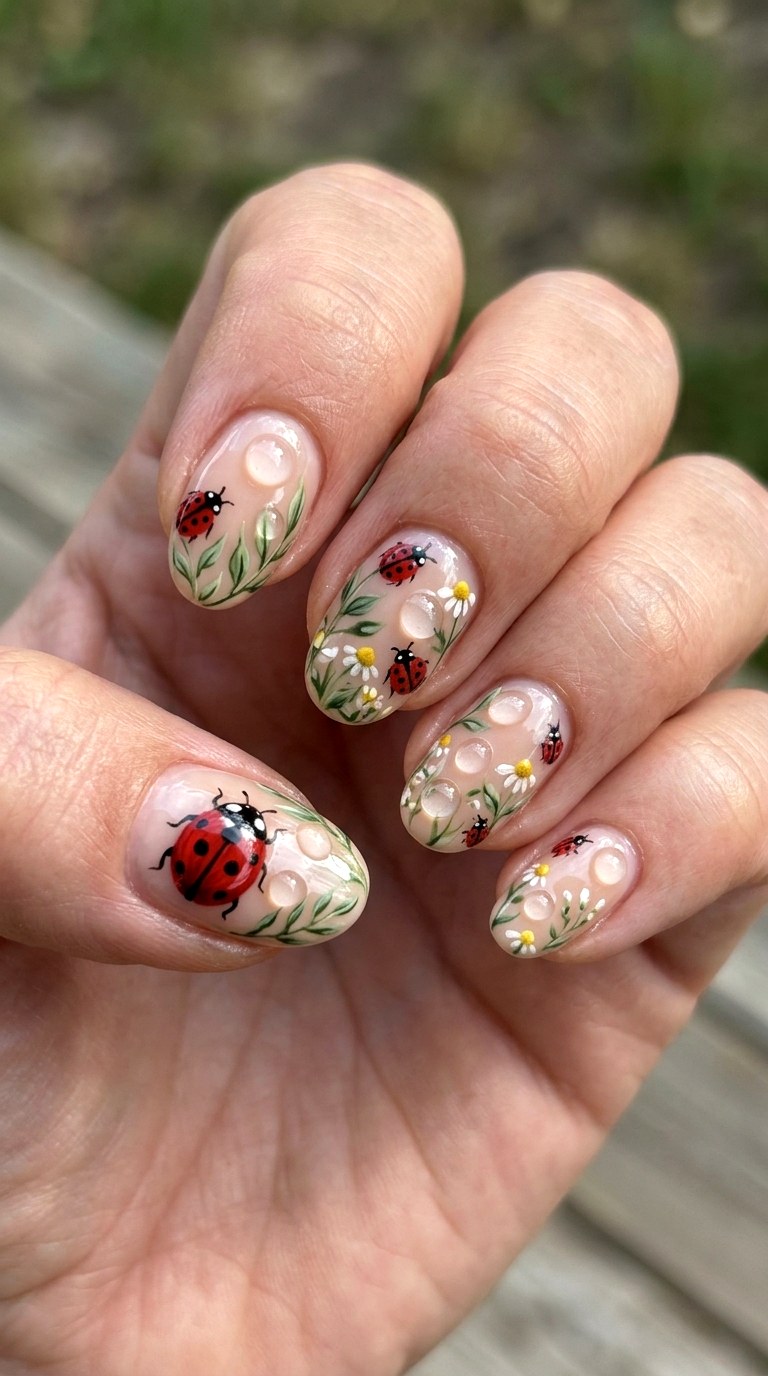
Add a fresh dimensional effect by combining detailed ladybugs with glossy water-drop accents. Use a no garden-inspired green or soft neutral base and create realistic-looking droplets beside leaves, flowers, and red ladybugs. The transparent raised drops should catch the light while leaving the illustrated insects clearly visible. Add black spots and fine antennae for recognizable detail. This design creates the feeling of a tiny no garden after morning rain, giving the manicure texture, shine, and visual depth while keeping the ladybug motif as the main attraction.
22. Maximalist Ladybug no garden Nails
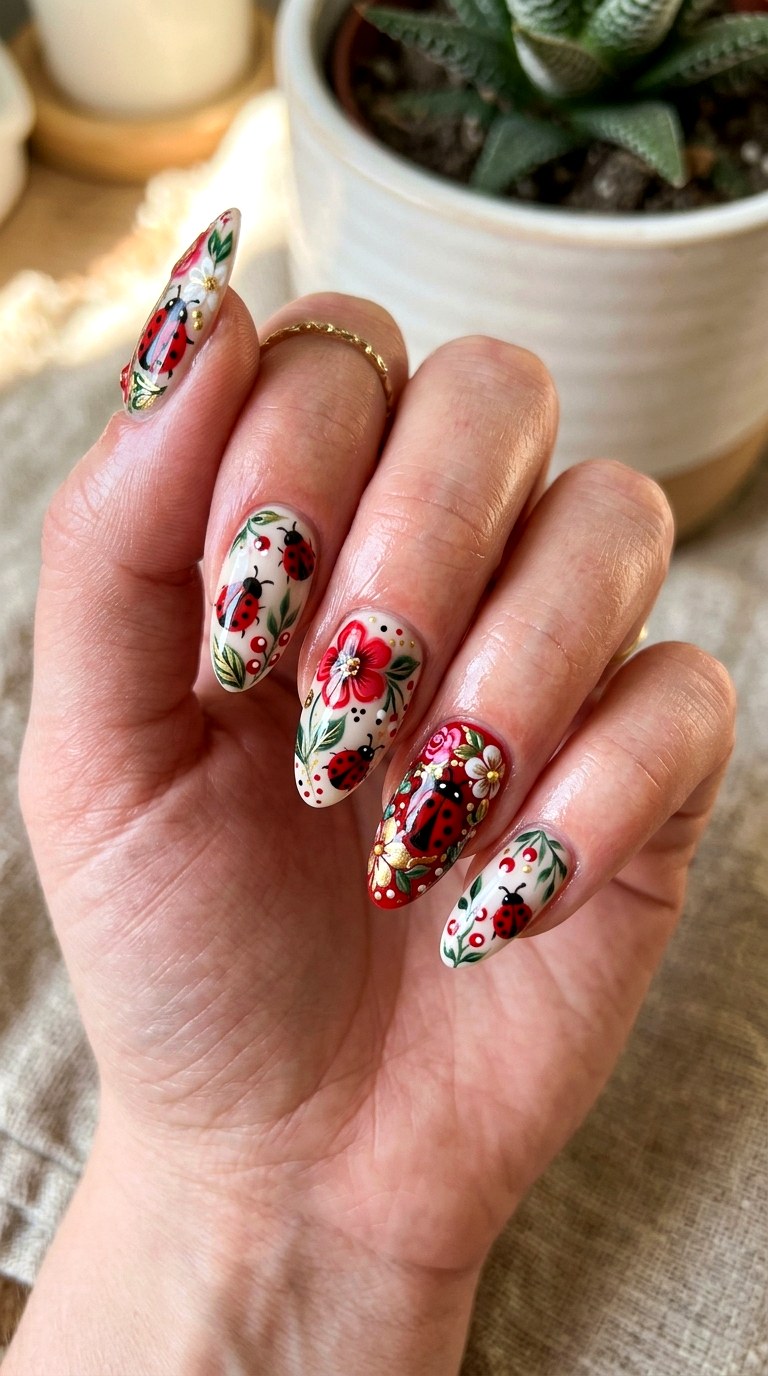
Go all in with a full no garden-themed manicure featuring large ladybugs, flowers, leaves, dots, berries, and dimensional details. Use a coordinated palette of red, black, green, white, and one carefully selected accent shade. Give each nail a different composition while repeating the ladybug motif throughout the set. Layering hand-painted artwork with glossy or raised details creates an intricate salon-style finish. This maximalist approach is ideal when you want your manicure to feel artistic, playful, and completely statement-making rather than understated.
Which Nail Design Will You Try First?
These 22 trendy ladybug nail ideas show just how versatile this cheerful motif can be. Classic red-and-black artwork can be transformed with French tips, florals, gingham, greenery, chrome, cat-eye finishes, 3D details, strawberries, and dimensional water drops. For a softer look, choose pink, milky white, sage, or mint backgrounds; for maximum impact, combine several no garden-inspired elements across every nail. The key is choosing a consistent palette and repeating a few signature details so even an elaborate manicure feels intentional. Save your favorite design for your next nail appointment, then personalize the colors, nail shape, finishes, and artwork placement to make your ladybug manicure uniquely yours.